
Keeping fresh, vibrant flowers inside your home all year round is easier than you think when you pair the right gardening tools with simple DIY projects. This guide walks you through selecting essential tools, building a budget-friendly indoor garden, and caring for popular indoor bloomers like African violets, peace lilies, and mini roses. Follow each step, and you’ll enjoy a thriving indoor oasis regardless of the season.
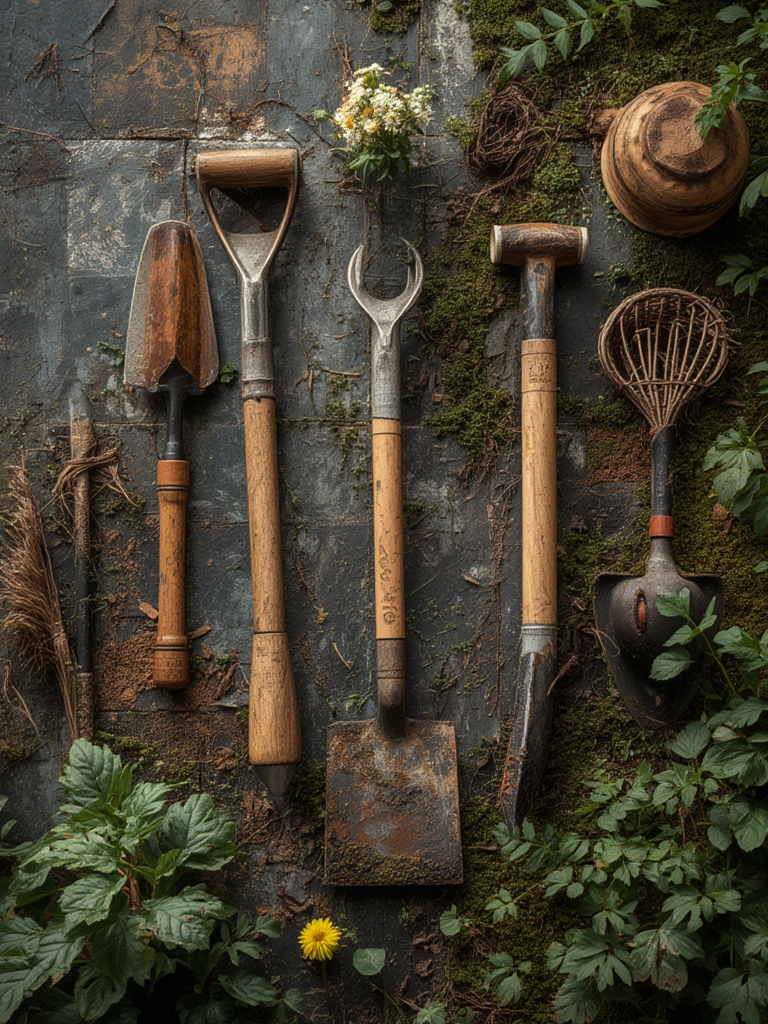
Essential Gardening Tools for Indoor Flower Care
1. Light‑weight Hand Trowel
A small, stainless‑steel trowel (about 4‑5 inches) lets you gently loosen soil without damaging delicate roots. Choose a model with a comfortable grip to reduce hand fatigue during frequent repotting.

2. Adjustable Watering Can
Opt for a can with a long, narrow spout and a removable rose. The narrow spout directs water straight to the soil, preventing water‑spot stains on leaves, while the rose can be removed for seedlings that need a gentle mist.

3. Pruning Shears (Secateurs)
Sharp, bypass‑type shears are perfect for trimming spent blooms and dead foliage. Keep the blades clean with rubbing alcohol after each use to avoid spreading disease.

4. Soil Moisture Meter
Even seasoned gardeners can misjudge indoor soil moisture. A cheap analog meter gives instant feedback, helping you water only when needed and preventing root rot.

5. Mini Grow Light Kit
LED grow lights with adjustable intensity mimic natural sunlight. Position the light 12‑18 inches above the plant and set a timer for 12‑14 hours daily during winter months.
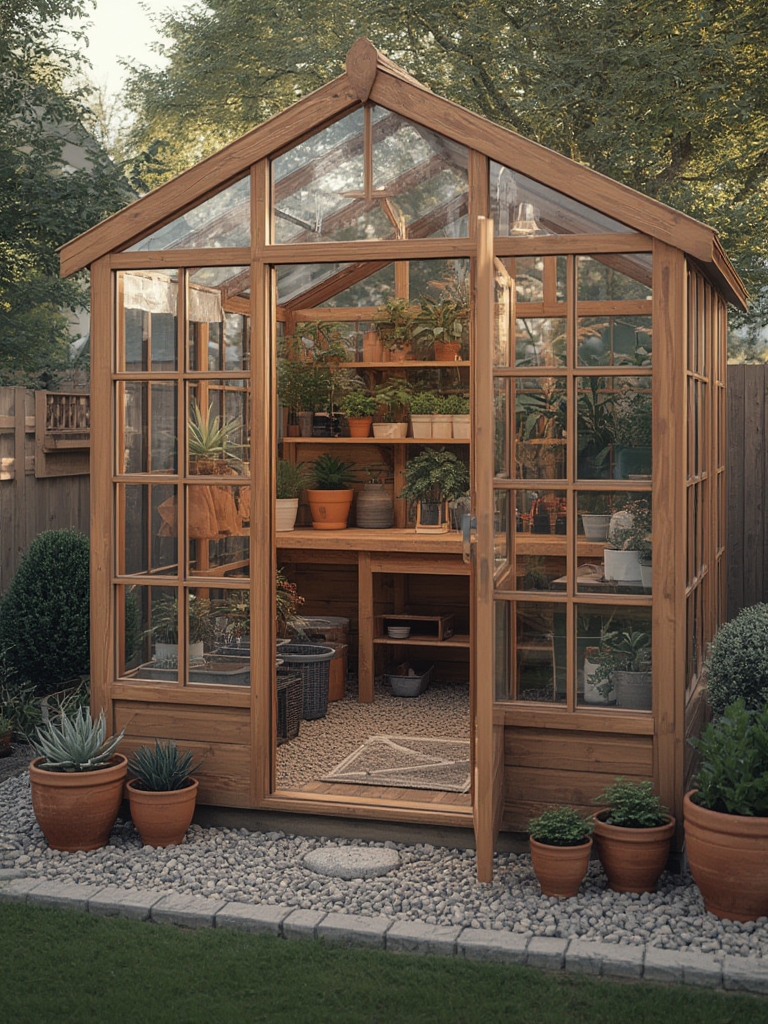
DIY Projects to Boost Indoor Flower Success
1. Self‑Watering Pot Using a Plastic Bottle
- Materials: 2‑liter plastic bottle, cotton wick, potting soil, and a decorative pot.
- Step 1: Cut the bottle in half. Puncture a small hole near the cap and insert a cotton wick, ensuring it reaches the bottom.
- Step 2: Fill the bottom half with water, then screw the cap back on.
- Step 3: Place the top half (without the cap) into your decorative pot, fill with soil, and plant your flower.
- Tip: The wick draws water slowly, keeping the soil consistently moist without over‑watering.
2. Portable Shelf Garden with Recycled Pallet
- Materials: Small wooden pallet, sandpaper, waterproof sealant, potting mix, and assorted containers.
- Step 1: Sand the pallet smooth and apply sealant to protect against moisture.
- Step 2: Attach small fabric pots using zip ties or small brackets.
- Step 3: Arrange your favorite flowering plants—think geraniums, begonias, or small orchids—so each gets adequate light.
- Tip: Position the shelf near a south‑facing window; rotate the pallet weekly for even light exposure.
3. DIY Humidity Tray for Tropical Blooms
- Materials: Shallow tray, pebbles, water, and a waterproof liner.
- Step 1: Line the tray with the liner, add a layer of pebbles, then pour water until it reaches just below the pebble surface.
- Step 2: Place your plant pot on top of the pebbles—avoid direct water contact with the pot base.
- Tip: This setup raises ambient humidity, which is crucial for peace lilies and orchids, especially in dry winter air.
Step‑by‑Step Care Routine for Indoor Flowering Plants
Step 1: Choose the Right Soil Mix
Use a well‑draining potting mix blended with perlite (20 %) and orchid bark (10 %). This combination prevents waterlogging while providing enough aeration for root health. For succulents, add extra sand to improve drainage.

Step 2: Potting and Repotting
- Pick a pot that’s 1‑2 inches larger than the current root ball.
- Place a layer of fresh soil at the bottom, set the plant, then backfill, firming gently with your hand.
- Water lightly to settle the soil, then add a mulch layer (e.g., shredded coconut) to retain moisture.
- Pro tip: Repot in early spring when new growth begins; this reduces transplant shock.
Step 3: Light Management
Most indoor flowering plants need 6‑8 hours of bright, indirect light. Use a light meter or simply check the plant’s leaves: pale, elongated leaves indicate insufficient light, while scorched edges signal too much direct sun. Adjust the plant’s position or supplement with LED grow lights as needed.
Step 4: Watering Technique
- Check soil moisture with your meter—water only when the top 1‑2 cm feels dry.
- Water slowly until it drains from the bottom hole; discard excess water to avoid soggy roots.
- For moisture‑loving plants (e.g., ferns), mist the foliage daily and keep the humidity tray filled.
- Quick tip: Use room‑temperature water; cold water can shock the roots.
Step 5: Feeding and Fertilizing
Apply a balanced, water‑soluble fertilizer (10‑10‑10) at half the recommended strength every 4‑6 weeks during the growing season (spring‑summer). Switch to a low‑nitrogen formula in fall to encourage blooming rather than leaf growth.
Step 6: Pruning and Deadheading
Remove wilted flowers and yellowing leaves with clean secateurs. This redirects energy to new buds and reduces the risk of fungal infections. For bushier growth, pinch back the tips of stems every 2‑3 weeks.
Step 7: Pest Monitoring
Inspect leaves weekly for aphids, spider mites, or mealybugs. A quick spray of diluted neem oil (1 % solution) or a wipe with a cotton swab dipped in rubbing alcohol can eradicate early infestations without harming the plant.
Data‑Driven Tips for Year‑Round Indoor Blooming
- Temperature: Most indoor flowers thrive between 65‑75 °F (18‑24 °C). Keep them away from drafts and heating vents.
- Humidity: Aim for 40‑60 % relative humidity. Use a hygrometer to monitor; a simple tabletop humidifier can raise levels during dry winter months.
- Light Duration: Adjust LED timers to mimic natural daylight cycles—12 hours in summer, 10 hours in winter—to prevent stress.
- Growth Tracking: Keep a small journal or use a plant‑care app to log watering dates, fertilizer applications, and bloom cycles. Over time, you’ll spot patterns that help fine‑tune care.
Putting It All Together: A Sample Weekly Schedule
| Day | Task |
|---|---|
| Monday | Check soil moisture; water if dry. Inspect for pests. |
| Tuesday | Rotate pots 90° for even light exposure. |
| Wednesday | Prune spent blooms; deadhead as needed. |
| Thursday | Apply fertilizer (half‑strength) if in growing season. |
| Friday | Clean leaf surfaces with a damp cloth to improve photosynthesis. |
| Saturday | Refresh humidity tray water; mist foliage. |
| Sunday | Review journal entries; plan any DIY adjustments for next week. |
Final Thoughts
By investing in a few high‑quality gardening tools, embracing simple DIY projects, and following a data‑driven care routine, you can enjoy vibrant indoor flowers every season. The combination of proper soil, consistent light, and mindful watering creates an environment where blooms not only survive but flourish. Start small, track your results, and watch your indoor garden transform into a year‑round showcase of color and life.


