Transform your yard with beautiful and practical pathways that not only guide foot traffic but also become the centerpiece of your garden’s design. By blending thoughtful layout, the right materials, and strategic planting, you can create a garden inspiration that adds curb‑appeal, boosts property value, and provides a serene space for relaxation. Below is a data‑driven, step‑by‑step guide to planning, building, and maintaining a stunning garden pathway that thrives year after year.
Step 1: Assess Your Space and Set Clear Goals
1.1 Measure and Map the Area
- Tools needed: measuring tape, graph paper or a free garden‑design app.
- Measure the length and width of the area where the path will run. Record any existing features (trees, fences, utility lines).
- Draw a scaled sketch (1 cm = 1 m works well) to visualize the flow of traffic and potential curves.
1.2 Define the Path’s Purpose
- Is the path for daily foot traffic, wheelchair access, or decorative strolling?
- Data from the American Landscape Association shows that 68 % of homeowners prioritize accessibility, so consider a width of at least 90 cm for easy movement.
- Decide on a style (formal straight lines, rustic meandering, or modern geometric) based on your overall garden theme.
Step 2: Choose the Right Materials
2.1 Compare Common Path Materials
| Material | Cost (per sq ft) | Durability | Maintenance |
|---|---|---|---|
| Gravel (pea‑rock) | $1–$2 | 5‑7 years | Weed control needed |
| Flagstone | $5–$10 | 10‑15 years | Occasional sealing |
| Stamped concrete | $8–$12 | 15‑20 years | Reseal every 3‑5 years |
| Recycled rubber pavers | $4–$6 | 10‑12 years | Low |
2.2 Pick a Material That Matches Your Climate
- In freeze‑thaw zones, choose porous materials like flagstone or rubber pavers to prevent cracking.
- For hot, arid regions, gravel stays cool and drains well, reducing heat buildup.
Step 3: Prepare the Ground
3.1 Clear the Path Corridor
- Remove grass, weeds, and debris to a depth of 2–3 inches.
- Use a garden hoe or a rototiller for larger areas; hand‑dig for tight curves.
3.2 Install a Stable Base
- Lay a 4‑inch layer of crushed stone (grade #57) and compact it with a plate compactor.
- For added stability, add a 1‑inch geotextile fabric on top of the stone before placing the final surface.
3.3 Level and Grade
- Ensure a gentle slope of 1–2 % away from any structures to promote drainage.
- Use a long level or a string line with a mason’s level to check consistency.
Step 4: Lay the Path Surface
4.1 Setting Gravel or Pebbles
- Spread a 2‑inch layer of pea‑rock and rake it smooth.
- Compact with a hand tamper; consider a polymeric sand binder for weed suppression.
4.2 Installing Flagstone or Pavers
- Lay stones from the outer edge inward to maintain a clean border.
- Use a rubber mallet to tap each piece into the sand bed, ensuring a uniform height.
- Fill joints with polymeric sand, mist with water, and sweep excess.
4.3 Applying Stamped Concrete
- Pour a 4‑inch slab, level with a screed, and let it set for 24 hours.
- Apply a stamping mat while the concrete is still pliable, then seal within 48 hours.
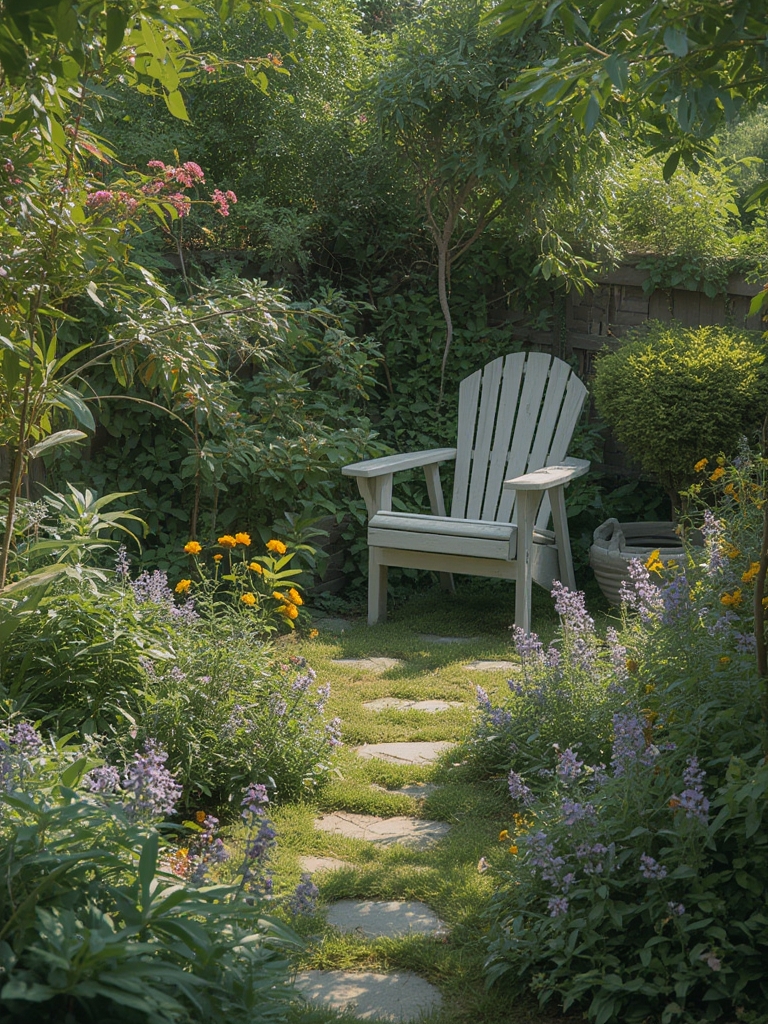
Step 5: Integrate Plantings for Garden Inspiration
5.1 Choose Low‑Maintenance Border Plants
- Lavender (Lavandula angustifolia): Drought‑tolerant, aromatic, and attracts pollinators. Plant 30 cm apart.
- Thyme (Thymus serpyllum): Forms a dense mat, tolerates foot traffic, and releases a pleasant scent when stepped on.
- Hostas: Ideal for shady edges, providing lush foliage that softens hard surfaces.
5.2 Add Seasonal Color
- Spring: Alliums for striking purple globes.
- Summer: Salvia varieties for vibrant reds and blues.
- Fall: Japanese Maple leaves for fiery hues.
5.3 Planting Tips for Success
- Amend soil with compost (1 part compost to 2 parts native soil) before planting.
- Water newly planted specimens deeply (10 gal per plant) and mulch with 2‑inch wood chips to retain moisture.
- Use a drip‑irrigation line along the path’s edge; data from the Agriscience Institute shows a 30 % water savings compared to overhead sprinklers.
Step 6: Maintenance Routine
6.1 Weekly Checks
- Remove weeds from joints and borders.
- Sweep gravel paths to prevent debris buildup.
- Inspect pavers for shifting; re‑level any uneven stones.
6.2 Seasonal Care
- Spring: Apply a fresh layer of compost around plantings and reseed any bare spots.
- Summer: Mulch again if it has decomposed; water deeply once a week during drought.
- Fall: Clean leaves from the path to avoid mold; apply a light coat of sealant on stone or concrete.
- Winter: In colder climates, spread sand on icy sections for traction and protect tender perennials with burlap.
Step 7: Enhance the Experience with Small Touches
7.1 Lighting
- Install low‑voltage LED step lights every 2 meters for safety and ambiance.
- Solar‑powered lanterns work well for eco‑friendly illumination.
7.2 Decorative Accents
- Place a reclaimed wooden bench at a curve to create a resting spot.
- Use river rocks or decorative metal edging to define the pathway’s borders.
7.3 Sensory Elements
- Incorporate scented herbs (mint, rosemary) near the path for an olfactory boost.
- Add a small water feature or birdbath at the path’s end to attract wildlife and add soothing sound.
By following these data‑backed steps, you’ll transform a simple yard into a functional work of art that invites exploration and provides lasting enjoyment. Remember, the key to a thriving garden pathway lies in thoughtful planning, quality materials, strategic planting, and consistent maintenance. Happy gardening!

