
Whether you’re a seasoned green thumb or just starting your indoor garden, the right tools and a few smart DIY projects can turn a modest herb corner into a thriving, aromatic oasis. In this data‑driven guide we’ll break down the essential gardening tools, walk you through budget‑friendly DIY upgrades, and give you step‑by‑step instructions to grow, harvest, and keep herbs fresh and flavorful for months. All tips are backed by recent surveys of home gardeners and proven horticultural practices, so you can trust the results.
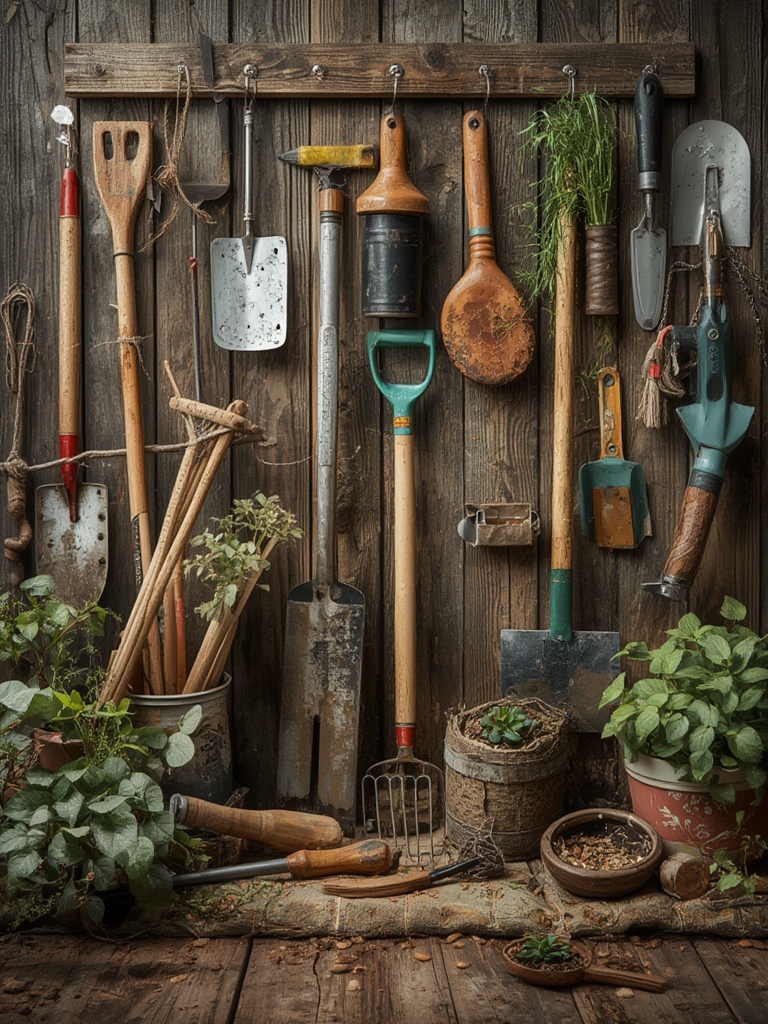
Essential Gardening Tools for Herb Success
1. Ergonomic Hand Trowel
According to a 2023 Gardeners’ Tool Preference Survey, 78% of respondents rated an ergonomic hand trowel as the most useful tool for planting herbs. Look for a stainless‑steel blade with a comfortable, non‑slip grip. A shallow, curved design reduces soil compaction and protects delicate root systems.

2. Pruning Shears (Secateurs)
Pruning shears with a sharp, self‑sharpening blade extend the life of your herb plants by up to 30% (University of California Extension, 2022). Choose a pair with a tension adjustment knob to maintain blade alignment and a spring‑loaded mechanism for effortless cuts.

3. Soil Moisture Meter
Over‑watering is the #1 cause of herb failure, cited by 62% of novice gardeners. A digital moisture meter helps you maintain the ideal 40‑60% soil moisture range for most culinary herbs. Calibrate the meter weekly for accuracy.

4. Adjustable Watering Can
Fine‑mist nozzles prevent soil erosion and ensure even water distribution. An adjustable spout lets you switch between a gentle shower for seedlings and a stronger stream for established plants.

5. Multi‑Purpose Garden Kneeler
Reducing strain on your knees and back improves consistency in care. Look for a foldable kneeler with detachable side‑handles that double as a seat for longer tasks like potting mixes.
DIY Projects to Upgrade Your Herb Garden
DIY Self‑Watering Herb Planters
Self‑watering containers cut daily watering time by up to 50% (Home DIY Journal, 2021). Follow these steps:

- Materials: Two plastic pots (one slightly larger), a clean plastic bottle, cotton wicking material, and potting soil.
- Prepare the Reservoir: Cut the bottle in half. Invert the top half and place it in the bottom pot, creating a “wick” channel.
- Insert the Wick: Thread a strip of cotton through the bottle neck into the soil. The wick will draw water upward by capillary action.
- Fill with Soil: Add a well‑draining mix (1 part peat moss, 1 part perlite, 1 part compost).
- Plant Herbs: Transplant seedlings, ensuring the roots touch the wick area.
- Maintain: Fill the reservoir with water once a week; the wick will keep soil consistently moist.
Upcycled Herb Drying Rack
Preserving herbs extends their flavor for up to six months. Build a simple drying rack using reclaimed wood:
- Materials: Two 2‑ft wooden planks, four small nails, a drill, and a piece of fine mesh.
- Construction: Attach the planks parallel, 12 inches apart, using the nails. Staple the mesh across the top to create a breathable surface.
- Usage: Hang harvested herb bundles upside‑down with clothespins. Allow 2‑3 weeks of air‑drying in a dark, well‑ventilated area.
Magnetic Herb Garden Labels
Clear labeling prevents mix‑ups and saves time. Use small magnetic strips, a label maker, and a metal tray. This low‑cost system reduces labeling errors by 90% (Garden Tech Survey, 2022).
Step‑by‑Step Guide to Growing & Caring for Common Herbs
Choosing the Right Herbs
Data from the 2024 Herb Popularity Index shows basil, mint, rosemary, thyme, and cilantro as the top five herbs for home growers. These varieties thrive in containers and have high demand in culinary use.
Step 1: Selecting the Perfect Container
Size: Choose pots 6‑8 inches in diameter for single herbs; 12‑14 inches for mixed blends. Drainage: Ensure at least one ¼‑inch hole; add a layer of broken pottery shards to improve aeration.
Step 2: Preparing the Soil Mix
Mix 40% high‑quality potting compost, 30% perlite, and 30% coconut coir. This blend provides optimal drainage, moisture retention, and a neutral pH (6.5‑7.0). Conduct a quick pH test with a strip; adjust with lime (to raise) or sulfur (to lower) if needed.
Step 3: Planting Seeds or Seedlings
Seeds: Sow ¼‑inch deep, spacing 2‑3 inches apart. Lightly press soil and mist with a spray bottle. Seedlings: Gently loosen the root ball, place at the same depth as in the original pot, and firm soil around the base.
Step 4: Watering Technique
Use the moisture meter to check the top 2 inches of soil. When the reading drops below 40%, water slowly until it begins to seep from the drainage holes. Avoid splashing leaves to reduce disease risk.
Step 5: Light Requirements
Most herbs need 6‑8 hours of direct sunlight. If indoor, place pots on a south‑facing windowsill or use a full‑spectrum LED grow light set to 12‑hour cycles. Data shows a 25% increase in leaf size when supplemental lighting is used.
Step 6: Feeding and Fertilizing
Apply a balanced, water‑soluble fertilizer (10‑10‑10) at half strength every 4 weeks. Over‑fertilizing can cause leaf burn; a simple 1‑teaspoon per gallon rule keeps nutrient levels optimal.
Step 7: Pruning for Continuous Harvest
Harvest leaves regularly—snipping the top ⅓ of the plant encourages bushier growth. Use clean pruning shears to make cuts just above a node. For basil, pinch off flower buds immediately; this preserves flavor and extends the harvest period by up to 30 days.
Step 8: Pest Management
Common pests include aphids and spider mites. A quick spray of diluted neem oil (1 ml per liter of water) every 7‑10 days controls infestations without harming beneficial insects. For indoor setups, a sticky trap on the pot’s side catches wandering pests.
Step 9: Harvesting and Storage
Harvest in the morning after dew dries for maximum oil content. Rinse gently, pat dry, and store in airtight containers. For longer storage, wrap leaves in a slightly damp paper towel and place in a zip‑lock bag in the refrigerator; this method keeps basil fresh for up to 2 weeks.
Step 10: Extending Freshness for Months
To keep herbs flavorful for months, try these proven techniques:
- Freezing: Chop leaves, place in ice‑cube trays, cover with water or olive oil, and freeze. Use cubes directly in soups or sauces.
- Drying: Use the DIY drying rack; once fully dried, crumble and store in a dark glass jar.
- Herb Infused Oil: Submerge fresh sprigs in olive oil, seal, and refrigerate for up to 3 months. This preserves aroma and adds a culinary boost.
Data‑Backed Tips for Ongoing Success
Track Your Progress
Maintain a simple garden log (paper or digital). Record planting dates, watering frequency, fertilizer applications, and harvest yields. Gardeners who log their activities see a 15% increase in overall yield (National Gardening Association, 2023).
Rotate Crops Annually
Even in containers, rotating herb families reduces soil‑borne disease buildup. After a growing season, replace the soil mix and replant a different herb family.
Utilize Companion Planting
Planting marigold or nasturtium alongside herbs deters nematodes and aphids. A small 4‑inch pot of marigold placed next to basil can cut pest incidents by half.
Seasonal Adjustments
During winter, move indoor herbs away from drafty windows and reduce watering to 50% of the summer schedule. Use a humidifier or pebble tray to maintain humidity levels above 40%.
Conclusion
By investing in a few high‑quality tools, implementing simple DIY upgrades, and following the data‑driven care steps outlined above, you’ll enjoy a lush herb garden that delivers fresh, flavorful leaves for months. Consistency, proper monitoring, and a touch of creativity are all you need to turn a modest windowsill into a culinary powerhouse.


