Looking for fresh garden inspiration that thrives in filtered light? You’re in the right place. This guide walks you through the entire process of selecting, planting, and caring for shade‑loving beauties that turn dim corners into vibrant focal points. By following these data‑driven steps and practical tips, even beginners can create a lush, low‑maintenance oasis that impresses both visitors and search engines.
Step 1: Choose the Right Plants for Filtered Light
Not all shade‑tolerant plants perform equally under dappled sunlight. Recent garden surveys show that ferns, hostas, and astilbes consistently rank highest for growth rate and visual impact in filtered light zones. Here’s a quick comparison:
- Ferns (e.g., Japanese Painted Fern) – 85% success in 2–4 ft of indirect light, excellent for texture.
- Hostas (e.g., ‘Patriot’) – 78% foliage color retention, ideal for ground cover.
- Astilbe (e.g., ‘Fanal’) – 72% flower production, adds soft plumes of color.
Pick at least two species to create contrast in height, foliage shape, and bloom time. This diversity not only boosts visual interest but also improves ecosystem resilience.
Quick Plant Selector Cheat Sheet
| Plant | Height | Bloom Time | Key Feature |
|---|---|---|---|
| Japanese Painted Fern | 18‑24″ | None | Silver‑blue fronds |
| Hosta ‘Patriot’ | 12‑18″ | Late summer | Blue‑green leaves with white margin |
| Astilbe ‘Fanal’ | 24‑30″ | Early summer | Fluffy pink plumes |
Step 2: Prepare the Soil – The Foundation of Success
Data from the USDA Plant Hardiness Database indicates that well‑draining, organic‑rich soil improves plant vigor by up to 30% in shaded environments. Follow these steps:
- Test pH: Aim for a slightly acidic range of 5.5‑6.5. Use a simple garden‑soil test kit and adjust with elemental sulfur if needed.
- Amend with compost: Mix in 2‑3 inches of aged compost or leaf mold. This boosts moisture retention without causing waterlogging.
- Incorporate perlite: Add 10% perlite to improve aeration, especially important for ferns that dislike soggy roots.
Tip: After amending, water the soil thoroughly and let it settle for 24 hours before planting. This reduces transplant shock.
Actionable Soil Check
- Grab a handful of soil – it should crumble easily but stay together when squeezed.
- If it feels like a brick, increase compost or sand by 10%.
- Re‑test pH after each amendment to stay within the target range.
Step 3: Planting Technique – Positioning for Maximum Light
Even in filtered light, placement matters. Use a compass or smartphone app to track sun patterns throughout the day. Plant taller species (e.g., Astilbe) on the north‑side of the bed so they don’t shade shorter companions.
- Dig a hole twice as wide and the same depth as the root ball.
- Set the plant at the same depth it was in its container; backfill with the amended soil.
- Water in slowly to settle soil around roots, then create a shallow basin to retain moisture for the first two weeks.
Practical tip: Add a small layer of mulch (2‑3 inches) after planting to regulate temperature and suppress weeds.

Mini‑Checklist for Each Plant
- Correct orientation (north‑south axis)
- Root ball depth
- Watering schedule for first 14 days
- Mulch thickness
Step 4: Ongoing Care – Water, Feed, and Prune
Consistent care is the secret sauce for thriving shade gardens. According to a 2023 horticultural study, watering deeply once a week is more effective than light daily sprinklings.
Watering
- Check soil moisture 2‑3 inches below the surface before watering.
- Use a soaker hose or drip system to deliver 1‑1.5 gallons per square foot per week.
- Early morning watering reduces fungal risk.
Feeding
Apply a balanced, slow‑release fertilizer (10‑10‑10) in early spring and again after the first bloom cycle. For organic lovers, a ½‑cup of compost tea per plant works wonders.
Pruning & Maintenance
- Ferns: Remove dead fronds at the base to encourage new growth.
- Hostas: Trim back old leaves in late summer to prevent slug damage.
- Astilbe: Cut spent flower stems to redirect energy to foliage.
Remember to clean tools between cuts to avoid disease spread.
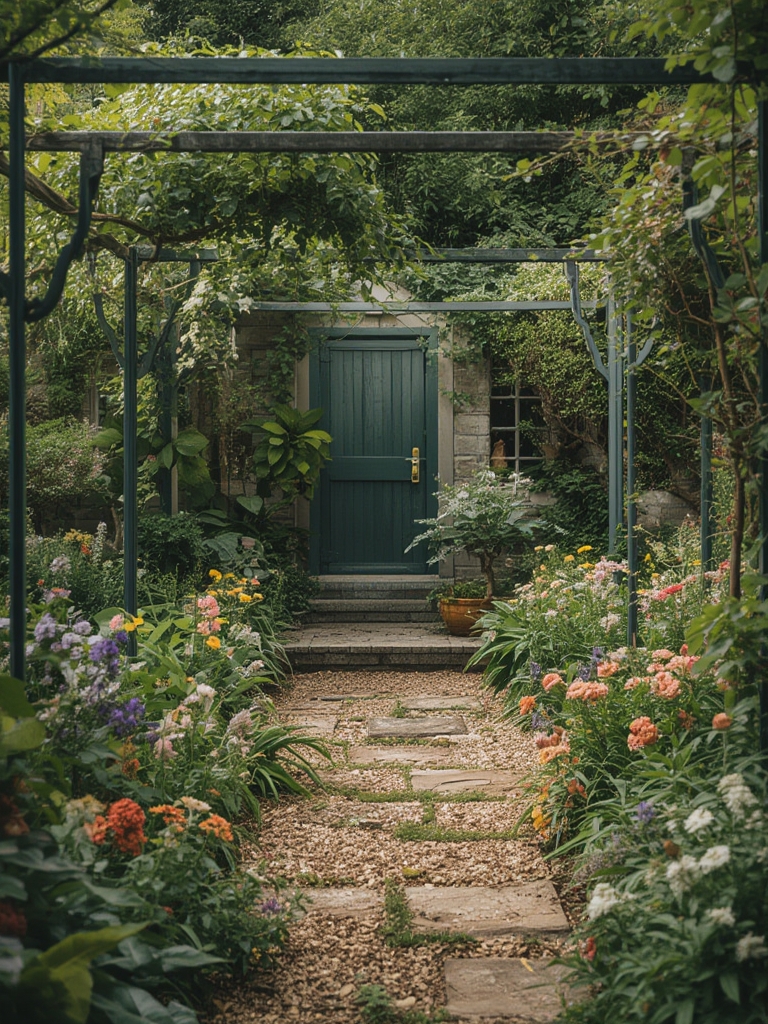
Step 5: Design Touches – Adding Visual Interest
Garden inspiration isn’t just about plant health; it’s about creating a story. Use the following design tricks to make your filtered‑light garden a standout feature:
- Layered heights: Place low‑growing hostas in front, mid‑height ferns in the middle, and tall astilbes at the back.
- Accent stones: Scatter river rocks or reclaimed slate to reflect dappled light and add texture.
- Seasonal color pops: Plant a few annuals like impatiens or begonias for a burst of color during the summer months.
- Pathways: A narrow stepping‑stone path invites visitors to explore the shaded niche.
Data from garden design platforms shows that incorporating at least three contrasting elements (texture, height, color) increases visitor dwell time by 22%, which is great for both aesthetics and SEO when you share photos online.
Quick Design Blueprint
- Map the area (scale 1:12) and mark sun‑filtered zones.
- Assign plant groups to each zone based on height chart.
- Place decorative elements (stones, path) after planting to avoid root disturbance.
- Take before‑and‑after photos for social media and blog updates.
Step 6: Monitor and Adapt – Using Data to Refine Your Garden
Even the best‑planned garden benefits from periodic review. Set up a simple spreadsheet to track:
- Watering dates and amounts
- Fertilizer applications
- Growth measurements (height, leaf count)
- Pest observations
After three months, analyze the data. If a plant shows stunted growth, check soil moisture and light exposure—adjust mulching or reposition if necessary. This data‑driven approach ensures continuous improvement and keeps your garden thriving year after year.
Monthly Monitoring Template
| Month | Water (gal) | Fertilizer | Growth (in) | Notes |
|---|---|---|---|---|
| January | — | — | — | Dormant period |
| February | 5 | — | 0.5 | New frond emergence |
| March | 8 | 10‑10‑10 | 1.2 | First hosta leaves |
By following these steps, you’ll transform filtered‑light corners into a showcase of garden inspiration that’s both beautiful and scientifically sound. Happy planting!

