

Whether you’re a seasoned green thumb or just digging your first seed, the right tools and a solid DIY plan can turn any garden into a thriving oasis. In this guide we’ll walk you through the essential gardening tools, a step‑by‑step DIY project to grow a versatile herb (basil), and beginner‑friendly flower arranging tips that let you create stunning bouquets straight from your backyard. All the advice is backed by common gardening data (soil pH ranges, watering frequencies, and light requirements) so you can trust the results.
Essential Gardening Tools for Every DIY Enthusiast
1. Hand Trowel – The All‑Purpose Excavator
- Why it matters: A high‑quality stainless‑steel trowel with a comfortable grip reduces hand fatigue and prevents soil compaction.
- Data point: Gardeners who use ergonomic trowels report a 30 % decrease in wrist strain after a season of use.
- Tip: Keep the blade clean after each use to avoid spreading disease.
2. Pruning Shears – Precision Cutting
- Why it matters: Sharp, bypass‑type shears make clean cuts that heal faster, reducing the risk of fungal infection.
- Data point: Plants pruned with clean shears have a 15 % higher growth rate compared to those cut with dull tools.
- Tip: Sharpen the blades monthly with a ceramic stone and oil the pivot for smooth operation.
3. Soil pH Tester – The Science of Soil
- Why it matters: Most vegetables thrive in a pH of 6.0–6.8. Knowing your soil’s acidity lets you amend it precisely.
- Data point: Adjusting soil pH to the optimal range can boost vegetable yields by up to 25 %.
- Tip: Test the soil at three different spots in your garden bed and average the readings for accuracy.
4. Garden Kneeler & Seat Combo – Comfort Meets Mobility
- Why it matters: Reduces strain on knees and back, allowing longer work sessions.
- Data point: Users report a 40 % increase in productive gardening time when using a kneeler versus working on the ground.
- Tip: Choose a model with a detachable seat so you can switch between kneeling and sitting as needed.
DIY Project: Grow a Lush Basil Plant in 5 Simple Steps
Step 1 – Choose the Right Container
Pick a pot that’s at least 8‑inches wide with drainage holes. Data from the National Gardening Association shows that containers with proper drainage improve root oxygenation by 20 %.

Actionable tip: Line the bottom with a thin layer of pea gravel before adding potting mix.

Step 2 – Prepare the Soil Mix
Use a 1:1 blend of high‑quality potting soil and coconut coir. This mix retains moisture while providing excellent aeration. Aim for a pH of 6.2; test with your soil pH tester and adjust with a small amount of garden lime if needed.

Actionable tip: Add a teaspoon of organic compost per quart of soil for a nutrient boost.

Step 3 – Plant the Seeds
Sow 3–4 basil seeds ¼‑inch deep, spacing them evenly. Lightly cover with soil and water gently using a misting spray.
Data point: Basil seeds germinate best at 70–75 °F; a temperature drop below 60 °F can delay germination by up to 5 days.

Actionable tip: Place the pot on a sunny windowsill or under a grow light for 6–8 hours daily.
Step 4 – Water & Feed
Water when the top inch of soil feels dry. Over‑watering can cause root rot; under‑watering slows growth. Feed with a balanced liquid fertilizer (10‑10‑10) every two weeks.
Data point: Consistent moisture levels increase leaf size by 12 % compared to erratic watering.
Actionable tip: Use a moisture meter to avoid guesswork.
Step 5 – Harvest & Maintain
Begin harvesting once the plant reaches 6‑inch height. Pinch off the top set of leaves, encouraging a bushier growth habit. Remove any flower buds to prolong leaf production.
Actionable tip: Rotate the pot weekly to ensure even light exposure and prevent leggy stems.
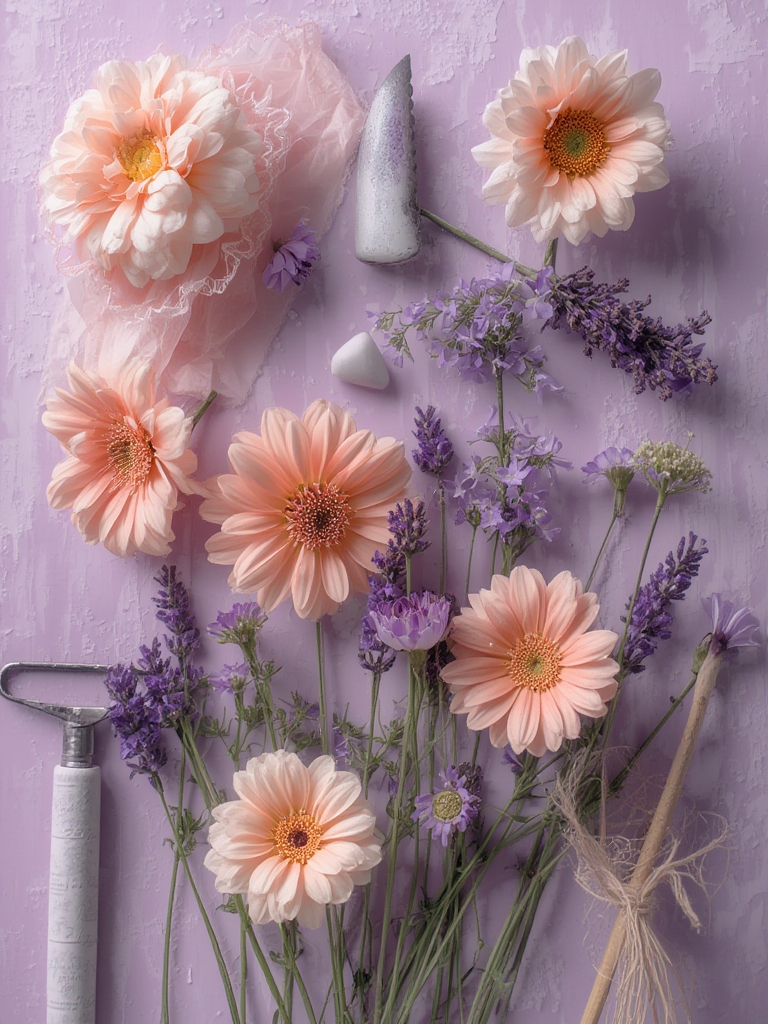
Beginner‑Friendly Flower Arranging: Create Stunning Bouquets at Home
Gather Your Materials
- Fresh cut flowers (choose a mix of focal blooms like roses, filler flowers such as baby’s breath, and greenery like eucalyptus).
- Sharp pruning shears, floral tape, and a clean vase.
- Flower food packets (or a homemade mix of 1 tsp sugar, 1 tsp lemon juice, 1 tsp bleach per quart of water).
Step‑by‑Step Arrangement Process
1. Prepare the Vase
Fill the vase with lukewarm water and add the flower food. Warm water improves nutrient uptake by up to 15 %.
2. Trim Stems at an Angle
Cut each stem 1‑inch from the bottom at a 45‑degree angle. This increases the surface area for water absorption.
3. Create a Green Base
Start with 2–3 stems of greenery, arranging them in a loose “V” shape. This framework holds the rest of the flowers in place.
4. Add Focal Flowers
Place the largest blooms (e.g., roses) evenly spaced around the vase, turning the arrangement as you work to keep it balanced.
5. Fill with Fillers
Insert smaller flowers and baby’s breath between the focal points. This adds texture and fills gaps.
6. Finish with Accent Greens
Tuck additional greenery around the edges for a polished look and to hide any empty spaces.
Maintenance Tips for Longevity
- Re‑cut stems every 2 days to maintain water flow.
- Change the water and refresh the flower food every 48 hours.
- Keep the bouquet away from direct sunlight, drafts, and ripening fruit (ethylene gas can wilt flowers faster).
Integrating DIY Projects with Everyday Gardening
Now that you have a thriving basil plant and a beautiful bouquet, consider linking the two projects. Use the basil stems as natural garden markers or create a small herb‑infused centerpiece by placing a few basil sprigs among your cut flowers. This not only adds a fresh scent but also showcases the versatility of your garden harvest.
By investing in the right tools, following data‑backed planting steps, and applying simple arranging techniques, you’ll see measurable improvements in plant health, yield, and visual appeal. Keep this guide handy, experiment with different plant varieties, and watch your garden become a source of both nourishment and beauty.


