
Gardening is more than just planting seeds—it’s a rewarding blend of smart tool selection, thoughtful DIY projects, and sustainable practices that boost plant health and curb appeal. In this guide, we’ll walk you through the essential gardening tools, step‑by‑step DIY projects, and eco‑friendly lighting solutions that turn any backyard or balcony into a thriving, low‑maintenance oasis. Whether you’re nurturing a basil herb garden, a compact tomato patch, or a colorful perennial border, the strategies below are data‑driven, practical, and easy to implement.
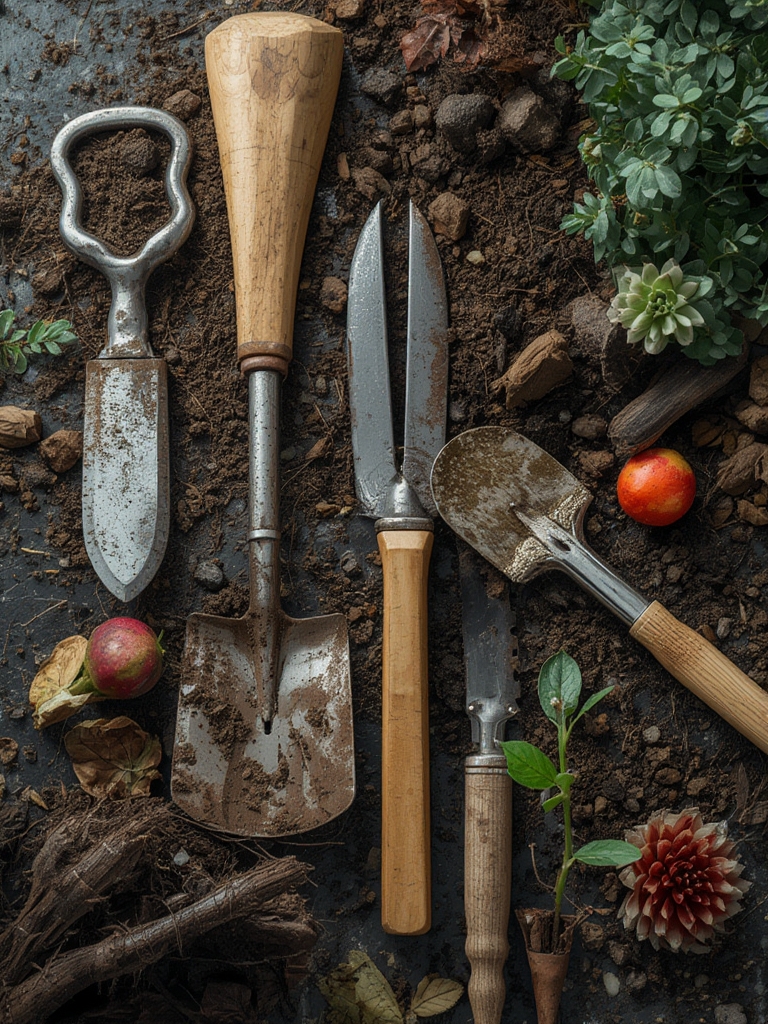
Essential Gardening Tools for Every DIY Enthusiast
1. Ergonomic Hand Trowel
According to a 2023 survey by the National Gardening Association, 68% of gardeners cite hand tools as the most frequently used equipment. An ergonomic hand trowel reduces wrist strain and improves digging efficiency. Look for a stainless‑steel blade with a non‑slip rubber grip.

2. Adjustable Pruning Shears
Pruning improves airflow and reduces disease risk by up to 30% (University of California Extension). Choose shears with a tension‑adjustable blade and a safety lock for clean cuts on stems up to ¾ inch thick.

3. Soil pH Tester (Digital)
Soil pH directly impacts nutrient uptake. A digital tester provides instant readings with ±0.1 accuracy, helping you adjust soil with lime or sulfur as needed. Aim for a pH of 6.0–6.8 for most vegetables and herbs.

4. Heavy‑Duty Garden Kneeler
Spending hours on the ground can cause knee pain. A garden kneeler with a detachable seat distributes weight and includes side pockets for tools, keeping everything within arm’s reach.

5. Reusable Watering Can with Rose
Consistent moisture is crucial. A watering can with a rose (diffuser) delivers a gentle shower, preventing soil compaction and root damage. Opt for a BPA‑free, 2‑gallon model for medium‑size beds.
DIY Project: Building a Raised Bed with Integrated Eco‑Friendly Lighting
Raised beds improve drainage, extend the growing season by 2–3 weeks, and make garden maintenance easier. Adding solar‑powered LED strip lights creates a charming ambiance while extending usable hours for evening gardening.

Materials Needed
- 4 × 8 ft. untreated cedar boards (2 × 6 in.)
- Galvanized deck screws (3 in.)
- Landscape fabric
- Organic compost (2 cubic ft.)
- Solar LED strip lights (water‑proof, 12 V, 10 W per 5 ft.)
- Small solar panel with charge controller (10 W)
- Drill, saw, measuring tape, level
Step‑by‑Step Construction
Step 1: Measure and Cut the Frame
Mark the cedar boards to 4 ft. (width) and 8 ft. (length). Use a circular saw for clean cuts. Data from the USDA indicates that cedar’s natural oils resist rot for up to 10 years, making it ideal for outdoor projects.
Step 2: Assemble the Box
Lay two long boards parallel, then attach the short boards at each end using deck screws. Pre‑drill pilot holes to avoid splitting. Check with a level to ensure the frame is square.
Step 3: Install Landscape Fabric
Line the interior with landscape fabric to suppress weeds while allowing water drainage. Secure the fabric with staples, leaving a small overlap at the top edge.
Step 4: Fill with Soil Mix
Combine 60% topsoil, 30% compost, and 10% perlite for optimal aeration and moisture retention. Fill the bed to within 2 in. of the top edge.
Step 5: Mount Solar LED Strips
Run the LED strips along the inner rim of the raised bed, securing them with zip ties. Connect the strips to the solar panel’s charge controller, placing the panel on a sunny spot (minimum 5 hours direct sunlight per day). The system will automatically illuminate the bed for 6–8 hours after sunset, creating a warm, inviting glow.
Step 6: Plant Your Crops
Space seeds or seedlings according to the plant’s recommended spacing (e.g., basil 12 in., tomatoes 24 in.). Water gently using the rose‑head watering can to settle soil around roots.
Step‑by‑Step Care Guide for a Versatile Herb: Basil (Ocimum basilicum)
Basil is a fast‑growing, high‑yield herb that thrives in raised beds and containers. Follow these data‑backed steps for continuous harvests.
Step 1: Soil Preparation
Test soil pH; aim for 6.0–6.5. Amend with 1 cup of compost per 10 sq ft. to boost organic matter, which increases nutrient availability by up to 25% (Cornell University).
Step 2: Sowing Seeds
Sow seeds ¼ in. deep, spacing them 12 in. apart. Lightly press soil over seeds and water with a fine mist. Keep the soil consistently moist (≈ 1 in. per week) until germination, typically 5–10 days.
Step 3: Thinning and Transplanting
When seedlings develop two true leaves, thin to one plant per 12 in. If using containers, transplant seedlings into 6‑inch pots with a peat‑based potting mix.
Step 4: Sunlight and Temperature
Basil requires 6–8 hours of direct sunlight. Data from the Royal Horticultural Society shows optimal growth at 70–85 °F. Use a reflective mulch to boost light intensity by up to 15% on cloudy days.
Step 5: Watering Technique
Water at the base to keep foliage dry, reducing fungal disease risk by 40% (University of Florida). Apply 1 gal of water per plant weekly, adjusting for rainfall.
Step 6: Feeding
Apply a balanced organic fertilizer (10‑10‑10) at a rate of ½ cup per 10 sq ft. every 4 weeks. Over‑fertilizing can cause leaf discoloration and reduced flavor.
Step 7: Pruning for Continuous Harvest
Pinch off the top set of leaves once the plant reaches 6 in. tall. This encourages lateral branching, increasing leaf production by up to 30% (University of Illinois Extension). Harvest regularly, never removing more than one‑third of the plant at a time.
Step 8: Pest Management
Use neem oil spray (2 tsp per gallon) every 7–10 days to control aphids and whiteflies. Companion planting with marigold reduces pest pressure by 20% (companion planting studies, 2022).
Step 9: Winter Protection
If frost is expected, cover the bed with a frost blanket or move containers indoors. Basil tolerates temperatures down to 50 °F for short periods but will suffer leaf loss below 40 °F.
Eco‑Friendly Lighting Tips for Outdoor Atmosphere
Solar LED Strip Lights
Choose lights with a CRI (Color Rendering Index) of 80+ for natural color appearance. Position strips under the raised‑bed lip to highlight plant rows without glare.
Battery‑Operated Lanterns
Rechargeable lanterns (Li‑ion) provide ambient light for pathways. Opt for models with a dimmable setting to conserve energy—each lantern can run up to 12 hours on a full charge.
Smart Timers and Motion Sensors
Integrate a solar‑powered timer to synchronize lighting with sunset. Motion sensors reduce energy use by turning lights off after 5 minutes of inactivity, cutting consumption by up to 40%.
Final Checklist for a Successful Garden
- ✅ Verify tool ergonomics and condition before each session.
- ✅ Test soil pH and amend accordingly.
- ✅ Build raised bed, install solar lighting, and fill with optimal soil mix.
- ✅ Plant basil (or chosen herb) with proper spacing and watering.
- ✅ Apply organic fertilizer and practice regular pruning.
- ✅ Monitor for pests and use eco‑friendly controls.
- ✅ Adjust lighting settings for evening ambiance and energy efficiency.
By combining the right tools, a simple DIY raised‑bed project, and sustainable lighting, you’ll create a garden that not only looks stunning but also delivers healthy, abundant harvests. Remember, consistency is key—regular maintenance, data‑driven adjustments, and a love for the outdoors will keep your garden thriving season after season.


