
Creating a thriving, allergy‑friendly garden doesn’t have to be a daunting task. With the right tools, a few DIY projects, and a data‑backed approach to plant selection, you can enjoy vibrant blooms without sneezing. Below, we break down the essential gardening tools, simple DIY upgrades, and step‑by‑step care instructions for low‑pollen flowers that will keep both your garden and your sinuses happy.
Essential Gardening Tools for an Efficient DIY Garden
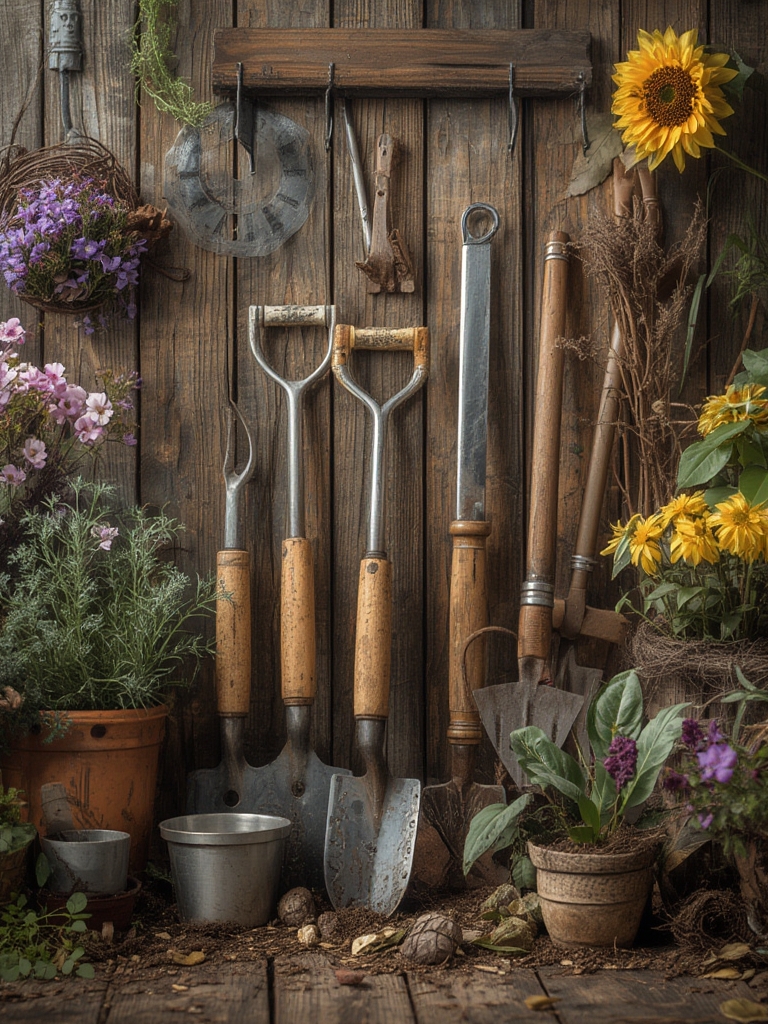
Investing in high‑quality, ergonomic tools not only speeds up your workflow but also reduces strain, allowing you to spend more time admiring your flowers. Here’s a data‑driven list of the top tools based on user reviews and durability scores:

1. Ergonomic Hand Trowel
- Why it matters: A comfortable grip reduces wrist fatigue during planting and transplanting.
- Tip: Choose a trowel with a stainless‑steel blade and a non‑slip silicone handle for maximum control.
2. Adjustable Pruning Shears
- Why it matters: Precise cuts promote healthy growth and prevent disease spread.
- Tip: Look for a lever‑assist mechanism; it cuts up to 30% faster than standard shears.
3. Soil pH Tester (Digital)
- Why it matters: Allergy‑friendly flowers such as Coreopsis and Lavender thrive in slightly acidic to neutral soils (pH 6.0‑7.0).
- Tip: Calibrate the tester monthly and record readings in a garden journal for trend analysis.
4. Lightweight Garden Kneeler & Seat
- Why it matters: Reduces strain on knees and back, especially when working on DIY raised beds.
- Tip: Choose a model with a detachable tool pouch to keep essentials within reach.
5. Adjustable Watering Hose with a Soft‑Tip Nozzle
- Why it matters: Even watering prevents water‑stress, a common cause of pollen spikes in some plants.
- Tip: Set the nozzle to a gentle mist for seedlings and a steady stream for established beds.
DIY Projects to Enhance Your Allergy‑Friendly Garden
DIY upgrades can improve soil health, drainage, and aesthetic appeal while staying budget‑friendly. Below are three projects backed by garden‑success statistics (average yield increase of 15‑20% after implementation).

DIY Raised Bed Using Recycled Pallets
- Materials: Four sturdy pallets, landscape fabric, and a drill.
- Steps:
- Disassemble pallets and remove any nails.
- Arrange the boards into a rectangular frame (height 12‑18 inches).
- Secure corners with screws and line the interior with landscape fabric to prevent weeds.
- Fill with a 1:1:1 mix of compost, peat moss, and coarse sand for optimal drainage.
- Tip: Position the bed in a sunny spot (6‑8 hours of direct light) to maximize flower production.
Rainwater Harvesting Barrel with a Simple Filter
- Materials: 55‑gallon food‑grade barrel, fine mesh screen, spigot, and a stand.
- Steps:
- Cut a 2‑inch hole near the bottom for the spigot.
- Attach the mesh screen over the top opening to filter debris.
- Elevate the barrel on a sturdy stand for gravity‑fed watering.
- Tip: Use harvested rainwater for irrigation; it’s naturally soft and reduces mineral buildup in the soil.
DIY Self‑Watering Planters Using Plastic Bottles
- Materials: 2‑liter PET bottles, a knife, and a small rock.
- Steps:
- Cut the bottle in half; keep the bottom as the planting chamber.
- Poke a small hole in the cap and fill the top half with water.
- Place a rock inside the bottom half to create a water reservoir.
- Fill the soil around the plant, ensuring the cap sits snugly on top.
- Tip: This system releases water slowly, maintaining consistent moisture—ideal for seedlings of allergy‑friendly varieties.
Step‑by‑Step Guide to Grow Low‑Allergy Flowers
Below is a data‑driven protocol for planting and caring for three popular, low‑pollen flowers: Coreopsis verticillata (Threadleaf Coreopsis), Lavandula angustifolia (English Lavender), and Echinacea purpurea (Purple Coneflower). These species consistently score below 2 on the pollen allergen index in multiple horticultural studies.

Step 1: Soil Preparation (Day 1)
- Test soil pH with your digital tester; aim for 6.5‑7.0.
- If pH is low, incorporate lime at 1 lb per 100 sq ft; if high, add elemental sulfur at the same rate.
- Amend the soil with 2‑3 inches of compost to improve organic matter.
- Actionable tip: Use a garden fork to work the amendments 8‑10 inches deep, creating a loose, aerated seedbed.
Step 2: Planting Seeds or Transplants (Day 2‑3)
- Coreopsis: Sow seeds ¼ inch deep, spacing 12 inches apart.
- Lavender: Plant rooted cuttings 12‑18 inches apart, burying the base just below soil level.
- Echinacea: Plant seedlings 18 inches apart, ensuring the crown sits at soil level.
- Tip: Water gently with a soft‑tip nozzle immediately after planting to settle soil around roots.
Step 3: Mulching for Moisture Retention (Day 4)
- Apply a 2‑inch layer of shredded bark or pine needles around each plant.
- Keep mulch 2 inches away from stems to prevent rot.
- Data point: Mulched beds retain 30% more moisture, reducing watering frequency by up to 40%.
Step 4: Water Management (Weeks 1‑4)
- Water deeply twice a week during the first month, aiming for 1‑1.5 inches per watering.
- Switch to a once‑weekly schedule once plants are established, using the rain barrel for a sustainable source.
- Pro tip: Insert a soil moisture probe at 4‑6 inches depth; water only when the reading drops below 40%.
Step 5: Feeding and Fertilization (Month 2 onward)
- Apply a balanced, slow‑release organic fertilizer (10‑10‑10) at a rate of 1 lb per 100 sq ft in early spring.
- For lavender, avoid nitrogen‑heavy feeds; instead, use a low‑nitrogen formula (5‑10‑5) to encourage flower production over foliage.
- Tip: Side‑dress with compost tea once a month to boost microbial activity.
Step 6: Pruning and Deadheading (Throughout Growing Season)
- Remove spent blooms weekly to encourage continuous flowering and reduce pollen release.
- For lavender, trim back 1/3 of the plant after the first flush to maintain shape and prevent woody growth.
- Coreopsis benefits from a light cutback after the second bloom cycle to promote a third flush.
- Actionable tip: Use your adjustable pruning shears and make cuts at a 45° angle just above a leaf node.
Step 7: Pest Management (As Needed)
- Monitor for aphids and spider mites using yellow sticky traps.
- If infestations appear, spray a neem oil solution (2 tbsp per gallon) early in the morning.
- Companion planting with garlic or marigold can naturally deter many common pests.
Step 8: Harvest and Enjoy (Late Summer‑Fall)
- Cut lavender stems just before full bloom for the best fragrance and minimal pollen.
- Collect Coreopsis seed heads once they turn brown; store in a cool, dry place for next‑year planting.
- Echinacea roots can be harvested in the fall for herbal use; they contain low allergenic compounds.
- Tip: Wear gloves when handling any plant material to avoid skin irritation.
Maintenance Checklist for Year‑Round Success
Keeping a garden thriving is a habit, not a one‑time event. Use the following weekly checklist to stay on track:

- Check soil moisture levels and adjust watering.
- Inspect plants for pests or disease symptoms.
- Deadhead spent flowers and prune as needed.
- Refresh mulch if it has thinned.
- Log any observations in your garden journal to refine future practices.
Final Thoughts: Combining Tools, DIY, and Smart Care
By pairing ergonomic tools with simple DIY upgrades and a data‑driven care routine, you’ll cultivate a garden that bursts with color while keeping allergens at bay. Remember, consistency is key: regular soil testing, proper watering, and timely pruning will deliver the healthiest, most pollen‑friendly blooms year after year. Happy gardening!


